
Introduction
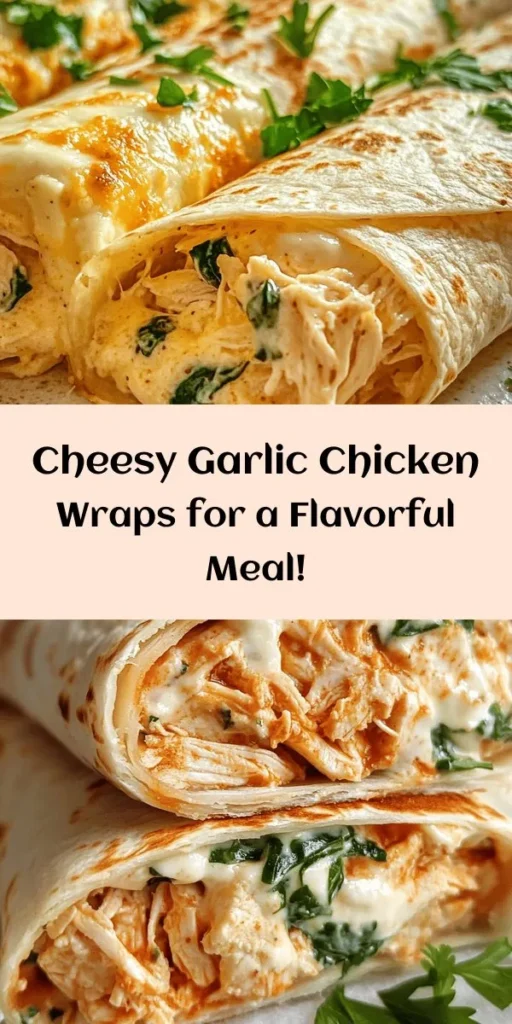
In recent years, wraps have surged in popularity as a versatile meal option that can suit any occasion—be it a quick lunch, an easy dinner, or a fun snack. Their flexibility allows for endless combinations of flavors and fillings, making them a favorite among home cooks and food enthusiasts alike. Among the myriad of wrap recipes, one stands out for its rich flavor and creamy texture: the Cheesy Garlic Chicken Wraps. This delightful recipe brings together the savory goodness of chicken, the irresistible meltiness of cheese, and the aromatic allure of garlic, creating a tantalizing dish that is as satisfying as it is simple to prepare.
Whether you’re a busy professional looking for a quick meal solution, a parent seeking a kid-friendly dinner option, or simply a cheese lover wanting to indulge, the Cheesy Garlic Chicken Wraps are sure to please. This dish caters to a variety of dietary preferences and can be easily customized to suit your taste. With just a few key ingredients and straightforward steps, you can whip up this decadent delight in no time.
Understanding the Ingredients
To create the perfect Cheesy Garlic Chicken Wraps, it’s essential to understand the role of each ingredient in this delicious recipe. Here’s a closer look at the key components that contribute to its mouthwatering flavor profile.
Cooked Chicken
The backbone of any great chicken wrap is, of course, the chicken itself. Using pre-cooked chicken not only saves time but also ensures that your meal comes together quickly and effortlessly. You can use leftover roasted chicken, rotisserie chicken from the store, or even grill some chicken breast in advance. Regardless of your choice, the tender and juicy chicken will serve as the primary protein source, enhancing the wrap’s overall heartiness.
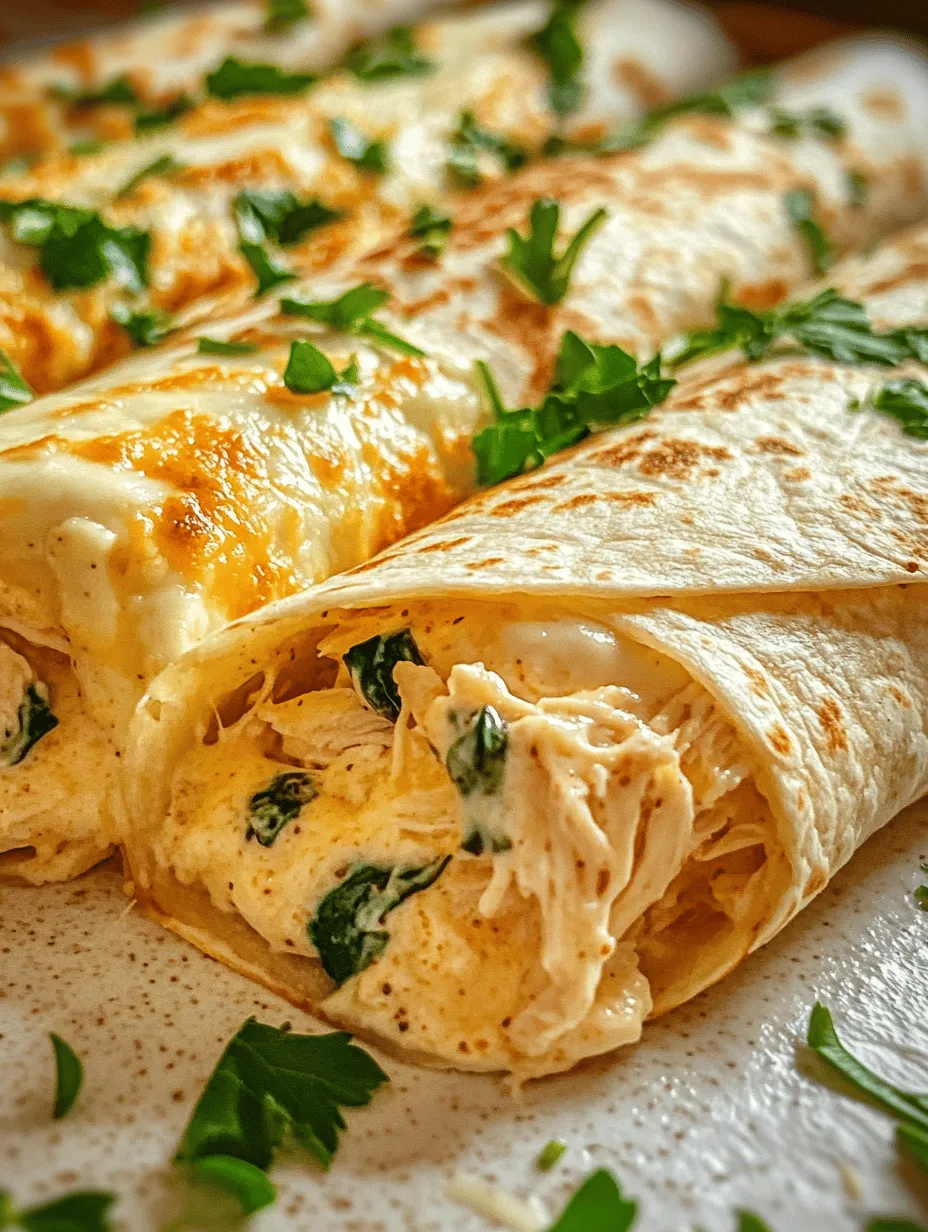
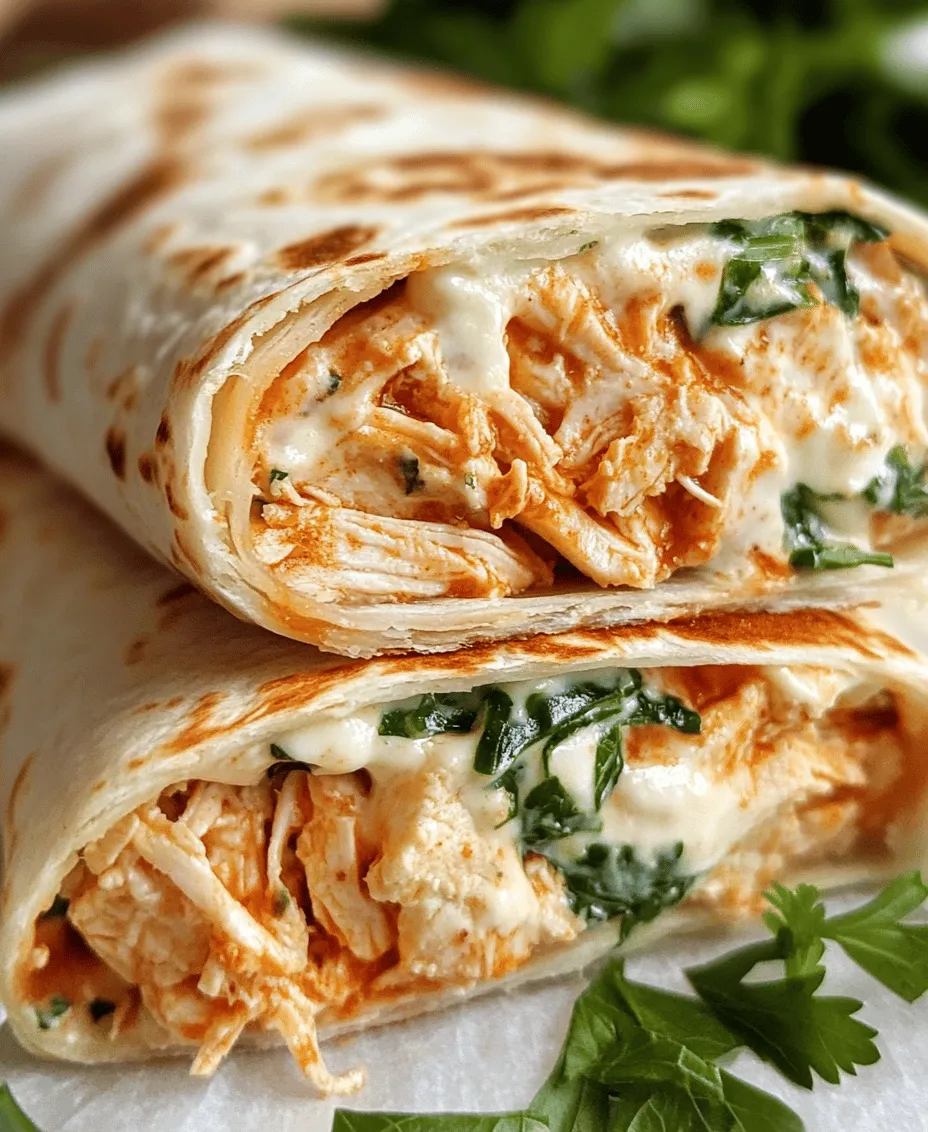
Mozzarella Cheese
When it comes to cheese, mozzarella is the star of the show in these wraps. Known for its exceptional melting properties, mozzarella provides that gooey, stretchy texture that is so satisfying in any cheesy dish. Its mild flavor complements the other ingredients without overpowering them, making it an ideal choice for this wrap. When melted, mozzarella adds a luscious creaminess that elevates the entire dish.
Cream Cheese
In addition to mozzarella, cream cheese plays a crucial role in achieving the wrap’s rich and creamy consistency. This ingredient adds depth and smoothness to the filling, creating a luxurious mouthfeel that pairs beautifully with the savory chicken and aromatic garlic. To ensure a well-blended mixture, it’s important to soften the cream cheese before mixing it with the other ingredients. This step is vital for achieving the perfect texture and flavor balance.
Garlic
Garlic is a superstar ingredient that brings a wonderful aromatic quality to the Cheesy Garlic Chicken Wraps. Not only does it enhance the overall flavor profile, but it also offers numerous health benefits, including anti-inflammatory properties and immune-boosting effects. Whether you choose to use fresh minced garlic or garlic powder, incorporating this ingredient will elevate your wraps to a whole new level of flavor.
Olive Oil
Olive oil is an essential element in both cooking the chicken and adding flavor to the filling. Known for its heart-healthy properties, olive oil helps to keep the chicken moist while imparting a subtle richness. A drizzle of olive oil during cooking can enhance the flavor of the wrap, making each bite more satisfying.
Flour Tortillas
The choice of wrap is crucial for the overall success of this dish. Flour tortillas are a popular option due to their soft texture and ability to hold fillings without tearing. When selecting tortillas, consider the size and thickness to ensure they can adequately contain the cheesy filling. Additionally, you can experiment with different flavored tortillas, such as garlic or spinach, to add an extra dimension of taste to your wraps.
Fresh Parsley
Garnishing your Cheesy Garlic Chicken Wraps with fresh parsley not only enhances the visual appeal but also adds a burst of freshness and flavor. The vibrant green color contrasts beautifully with the creamy filling and offers a mild herbaceous note that balances the richness of the cheese and chicken. Finely chopping the parsley and sprinkling it on top will elevate your dish, making it look as good as it tastes.
Optional Spinach or Arugula
For those looking to incorporate more greens into their meals, adding spinach or arugula to your wraps is a fantastic option. These leafy greens provide a nutritional boost while adding a lovely peppery flavor. Spinach is particularly great for its mild taste and texture, while arugula offers a more robust flavor that can stand up to the richness of the cheese. Including greens not only enhances the nutritional value of your wraps but also creates a more balanced meal.
Preparation Steps for Cheesy Garlic Chicken Wraps
Now that we’ve covered the essential ingredients, let’s dive into the preparation of the Cheesy Garlic Chicken Wraps. Follow these detailed steps to create a delicious and satisfying meal.
Step 1: Prepare the Creamy Mixture
Start by combining the cream cheese and mozzarella cheese in a mixing bowl. If your cream cheese is cold, microwave it for about 15-20 seconds to soften it, making it easier to mix. Use a spatula or a fork to thoroughly blend the two cheeses until they form a smooth mixture. The goal is to create a creamy base that will envelop the chicken and garlic, so take your time with this step.
Step 2: Add Garlic and Seasoning
Once your cheese mixture is well combined, add in minced garlic (or garlic powder) and season with salt and pepper to taste. If you’re using fresh garlic, consider sautéing it in a bit of olive oil for a minute or two before adding it to the mixture to bring out its natural sweetness. This step will deepen the flavor of your wraps significantly. Mix everything together until the garlic is evenly distributed throughout the creamy base.
Step 3: Prepare the Chicken
If you’re using leftover cooked chicken, shred or chop it into bite-sized pieces. For those who are cooking chicken specifically for this recipe, season the chicken breast with salt and pepper, then heat a tablespoon of olive oil in a pan over medium heat. Add the chicken and cook until golden brown and cooked through, about 5-7 minutes per side, depending on thickness. Once cooked, allow it to cool slightly before chopping it into smaller pieces to incorporate into your wraps.
Step 4: Combine the Mixture
With the chicken prepared, fold it into the creamy cheese and garlic mixture. Ensure that every piece of chicken is coated with the flavorful mixture, as this will be the heart of your wraps. If you want to add greens, throw in a handful of chopped spinach or arugula at this stage, mixing them in gently.
Step 5: Assemble the Wraps
Now comes the fun part—assembling your Cheesy Garlic Chicken Wraps! Lay a flour tortilla flat on a clean surface. Spoon a generous amount of the chicken and cheese mixture into the center of the tortilla, leaving about an inch of space on the edges. To ensure a neat wrap, fold the sides of the tortilla inward and then roll it tightly from the bottom up. If you’re having trouble keeping the wrap together, you can secure it with a toothpick or wrap it in parchment paper for easy handling.
Visualizing the Assembly Process
To make the assembly process even clearer, visualize these steps:
1. Lay the Tortilla: Place the tortilla on a clean, flat surface (a cutting board works well).
2. Add Filling: Spoon the creamy chicken mixture into the center, spreading it out slightly but keeping it concentrated in the middle.
3. Fold the Edges: Fold the sides of the tortilla inward towards the center, ensuring the filling stays put.
4. Roll It Up: Starting from the bottom, roll the tortilla tightly upwards, tucking it in as you go to secure the filling.
5. Final Touches: If desired, garnish the top with a sprinkle of fresh parsley for added flavor and presentation.
By following these preparation steps, you will end up with a deliciously cheesy and flavorful wrap that is sure to impress. The combination of creamy cheese, tender chicken, and aromatic garlic creates an irresistible dish that is perfect for any occasion.
Stay tuned for the next steps where we’ll explore cooking techniques, serving suggestions, and additional tips for achieving the best results with your Cheesy Garlic Chicken Wraps!
Techniques for Wrapping the Tortillas Securely
Wrapping tortillas around fillings may seem straightforward, but achieving a secure wrap can enhance both the eating experience and presentation. Here are some techniques to ensure that your Cheesy Garlic Chicken Wraps stay tightly wrapped and all fillings remain contained:
1. Start with Warm Tortillas: Heat your tortillas slightly before wrapping. This makes them more pliable and less likely to crack. You can warm them in a skillet for about 30 seconds on each side or wrap them in a damp paper towel and microwave them for 10-15 seconds.
2. Use the Right Amount of Filling: Avoid overfilling your wraps. A good rule of thumb is to use about 1/2 to 3/4 cup of filling, depending on the size of your tortilla. This helps prevent tearing and makes it easier to roll.
3. Position the Filling Correctly: Place your filling in the center of the tortilla, leaving a couple of inches on the sides. This allows you to fold the sides in before rolling, which secures the filling.
4. Tuck and Roll: Start by folding in the sides of the tortilla over the filling. Then, begin rolling from the bottom up, tucking the filling in as you go. Continue rolling until you reach the top, ensuring the tortilla is snug around the filling.
5. Seal the Wrap: For extra security, you can lightly moisten the edge of the tortilla with water or a bit of the sauce before sealing. This helps it stick and stay closed during cooking and serving.
Tips on Ensuring All Fillings are Contained
To make sure that all your delicious fillings remain inside the wrap, consider these additional tips:
– Layer Carefully: When adding fillings, layer them from heaviest to lightest. Start with the chicken, followed by cheese, and finish with lighter ingredients like lettuce or tomato. This helps in keeping the heavier items at the bottom.
– Press Down Gently: After you’ve added the fillings, press down gently before rolling. This compresses the filling slightly and makes it easier to wrap securely.
– Use a Toothpick or Skewers: If you’re worried about the wraps coming undone, you can secure them with a toothpick or a skewer. Just remember to remove them before serving.
Cooking and Serving the Wraps
Now that your wraps are securely folded, it’s time to cook and serve them to achieve the best possible flavor and texture.
Guidance on Heating the Wraps for Optimal Texture and Flavor
To cook your Cheesy Garlic Chicken Wraps, you can choose between grilling, pan-frying, or baking:
1. Grilling: Preheat your grill to medium heat. Place the wraps on the grill and cook for about 3-4 minutes on each side, pressing down slightly to create grill marks and to help melt the cheese.
2. Pan-Frying: Heat a non-stick skillet over medium heat and add a small amount of oil. Place the wraps seam-side down in the skillet. Cook for about 3-4 minutes per side until golden brown and crispy.
3. Baking: Preheat your oven to 400°F (200°C). Place the wraps on a baking sheet and bake for about 10-12 minutes, turning halfway through, until they are golden and the cheese is melted.
Discuss the Significance of Achieving a Golden-Brown Exterior
Achieving a golden-brown exterior on your wraps is important for both aesthetics and taste. A well-cooked wrap will have a crispy texture that contrasts delightfully with the gooey, cheesy filling. This not only enhances the flavor but also adds visual appeal, making your wraps look more appetizing.
Presentation Tips for Serving the Wraps
Presentation can elevate your dining experience. Here are some tips to serve your Cheesy Garlic Chicken Wraps appealingly:
– Slice for Appeal: Cut the wraps in half diagonally to showcase the colorful filling inside. This way, guests can see the delicious layers and it makes for easier eating.
– Use a Platter: Serve the wraps on a large platter, garnished with fresh parsley or a sprinkle of paprika for a pop of color.
– Add Dipping Sauces: Serve with a side of ranch dressing, garlic aioli, or salsa for dipping. This not only adds flavor but also enhances the presentation with vibrant colors.
– Garnish: Fresh herbs like chopped parsley or cilantro can be sprinkled on top for a burst of color and freshness.
Nutritional Value and Benefits
Understanding the nutritional content of your Cheesy Garlic Chicken Wraps can help you appreciate their benefits.
Analysis of the Nutritional Content of the Wraps
Each serving of these wraps provides a balanced mix of macronutrients, making them a satisfying meal option. Here’s a breakdown:
– Protein Content: The chicken and cheese in the wraps contribute significantly to the protein content, which is essential for muscle repair and overall health. A standard serving can provide around 25-30 grams of protein.
– Vitamins from Garlic and Parsley: Garlic is known for its numerous health benefits, including immune support, while parsley adds vitamins A, C, and K, which are important for skin health and bone strength.
Potential Variations for Dietary Considerations
For those with dietary restrictions or preferences, here are some suggestions:
– Gluten-Free Options: You can use gluten-free tortillas made from rice flour, corn, or almond flour, ensuring that everyone can enjoy this delicious wrap.
– Dairy-Free Alternatives: For a dairy-free version, substitute cheese with nutritional yeast or a dairy-free cheese alternative, allowing those with lactose intolerance to savor the flavor without the discomfort.
Creative Variations and Pairings
Your Cheesy Garlic Chicken Wraps can be customized in numerous ways to suit your taste preferences.
Ideas for Customizing the Cheesy Garlic Chicken Wraps
– Different Protein Options: Swap out chicken for other proteins like turkey or shredded beef for a different flavor profile. For a vegetarian option, consider using tofu or chickpeas seasoned with similar spices.
– Flavor Variations: Experiment with different spices or sauces to create unique flavors. Try adding smoked paprika, cumin, or even a spicy chili sauce for an extra kick.
Recommended Side Dishes to Complement the Wraps
Pair your wraps with delightful side dishes for a complete meal:
– Salads: A fresh garden salad or a tangy coleslaw pairs wonderfully with wraps, balancing the richness of the cheese.
– Dips and Salsas: Serve with a side of guacamole, salsa verde, or a yogurt-based dip to enhance the flavor experience.
Conclusion
In summary, Cheesy Garlic Chicken Wraps offer an easy and delicious meal option that can be tailored to suit various tastes and dietary needs. Their versatility makes them an ideal choice for lunch, dinner, or even a quick snack. With straightforward preparation and a variety of flavor combinations, these wraps can easily become a staple in your home cooking repertoire.
We encourage you to try this recipe and experience the delight of these cheesy, garlicky wraps. Regardless of how you choose to customize them, the combination of flavors and textures is sure to satisfy. Embrace the world of wraps and enjoy creating your own delicious variations!
