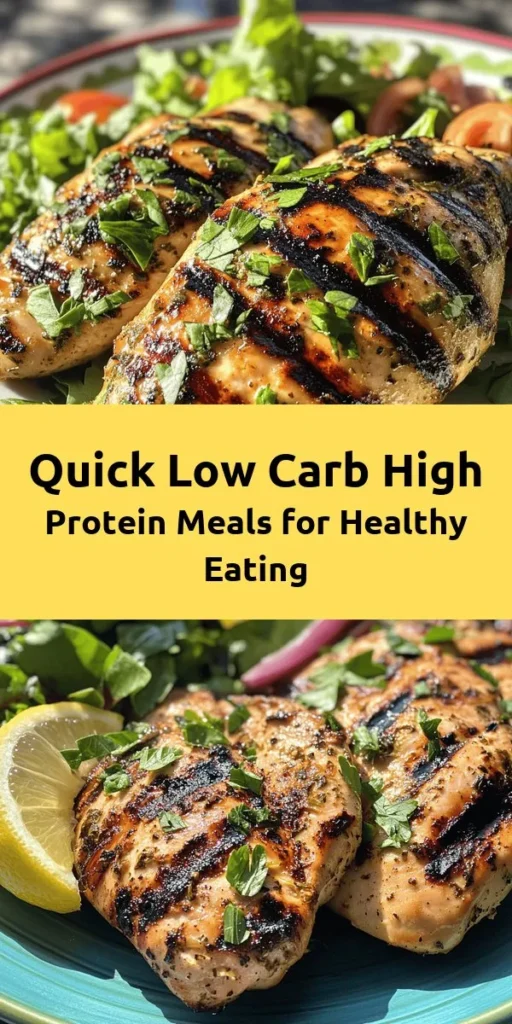
Introduction to Low Carb High Protein Meals
In today’s fast-paced world, where health and wellness take center stage, many individuals are turning to low-carb, high-protein diets. This approach not only supports weight management but also promotes a balanced lifestyle without sacrificing flavor or satisfaction. Low-carb, high-protein meals are not just a trend; they are a lifestyle choice that has gained immense popularity among fitness enthusiasts, busy professionals, and anyone seeking to enhance their culinary experience while adhering to healthier eating habits.
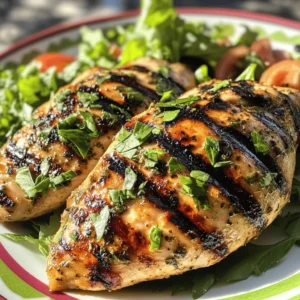
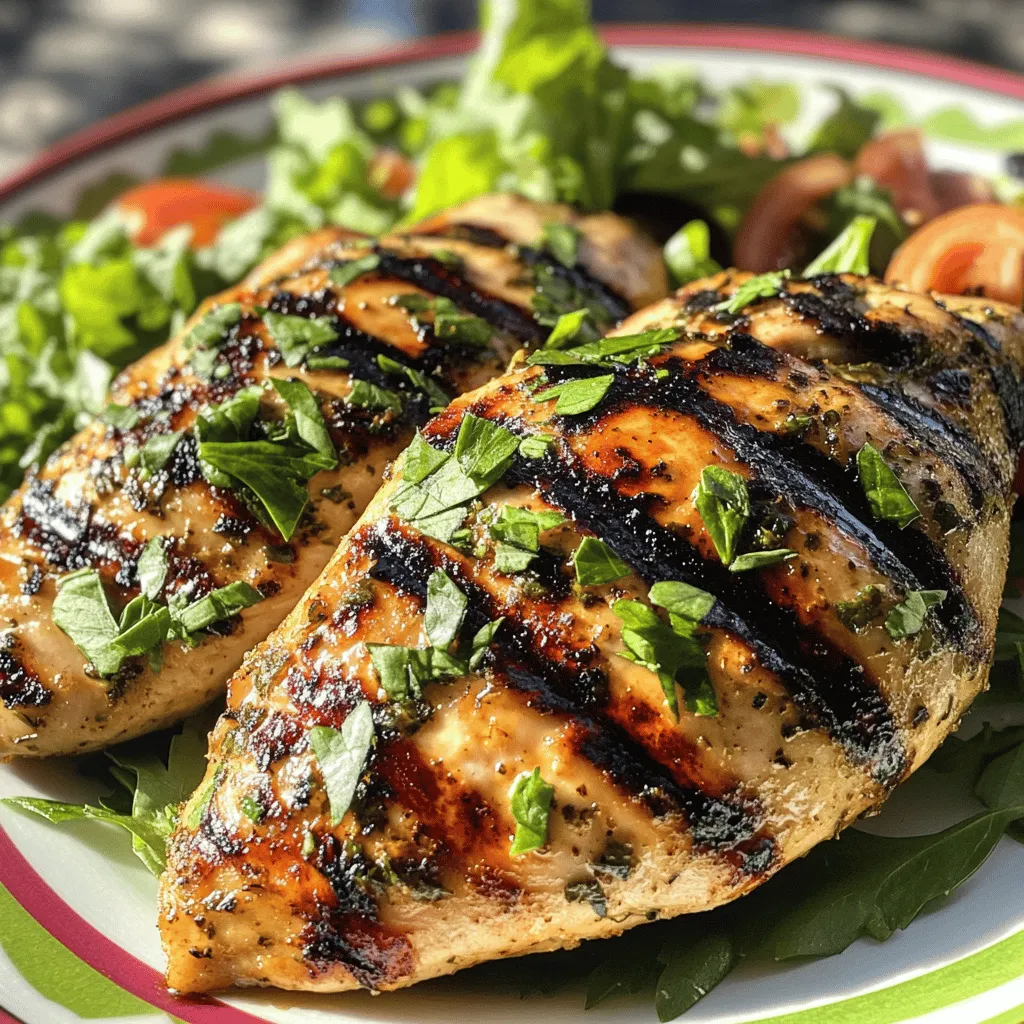
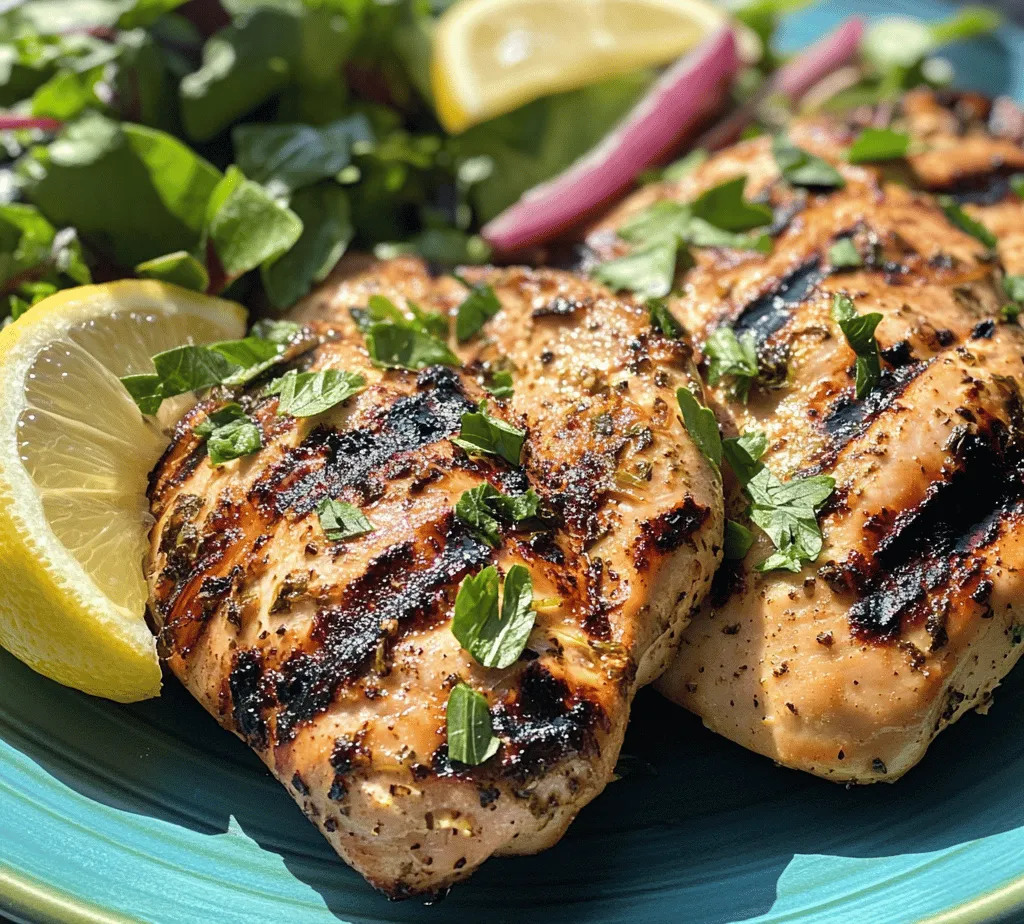
This article presents a delightful collection of 12 quick and easy recipes, each designed to satisfy your cravings while providing the nutritional benefits your body deserves. Among these recipes, the Zesty Lemon Herb Grilled Chicken stands out as an ideal option for those looking to enjoy a delicious, protein-rich meal without the excess carbohydrates. With a bright and flavorful marinade that features fresh herbs and zesty lemon, this dish embodies the essence of a healthy, satisfying meal.
Understanding the Benefits of Low Carb High Protein Diets
The Rise of Low Carb High Protein Diets
Low-carb, high-protein diets have surged in popularity, thanks in part to their effectiveness in promoting weight loss and improving overall health. The fundamental principle behind this dietary approach is to reduce carbohydrate intake while increasing protein consumption. By doing so, individuals can stabilize blood sugar levels, curb hunger, and enhance their metabolism.
As more people become aware of the detrimental effects of high-carb diets—such as spikes in insulin levels and increased fat storage—the shift towards low-carb, high-protein options has become a preferred choice. This dietary shift is not merely about losing weight; it’s also about fostering a healthier lifestyle that includes nutrient-dense foods that support energy levels and muscle maintenance.
Nutritional Advantages
Adopting a low-carb, high-protein diet offers numerous health benefits that can positively impact your life. One of the primary advantages is its potential to aid in weight loss. By limiting carbohydrates, the body enters a state of ketosis, where it begins to burn fat for energy instead of glucose. This not only helps shed unwanted pounds but also promotes a leaner body composition.
Moreover, a high-protein intake is essential for muscle maintenance, especially for those who engage in regular physical activity. Protein serves as the building block for muscles and aids in recovery post-exercise. Additionally, incorporating protein-rich foods can enhance satiety, helping individuals feel fuller for longer periods and reducing the likelihood of unhealthy snacking.
Zesty Lemon Herb Grilled Chicken
Ingredients Overview
The Zesty Lemon Herb Grilled Chicken recipe is both simple and flavorful, making it a perfect addition to your meal prep routine. Here are the key ingredients you will need, along with their nutritional benefits:
– Chicken Breasts: A lean source of protein, chicken breasts are low in fat and high in essential nutrients like B vitamins, which are crucial for energy metabolism and maintaining a healthy nervous system.
– Fresh Lemon Juice: Rich in vitamin C, lemon juice not only adds a refreshing flavor but also supports the immune system and aids in collagen production for healthy skin.
– Olive Oil: A heart-healthy fat, olive oil is packed with antioxidants and has anti-inflammatory properties. It also aids in the absorption of fat-soluble vitamins.
– Garlic: Known for its numerous health benefits, garlic can help boost the immune system, reduce blood pressure, and improve cholesterol levels.
– Fresh Herbs (such as parsley, thyme, and rosemary): These herbs add flavor without extra calories and are also rich in antioxidants and anti-inflammatory compounds.
Step-by-Step Instructions
Now that you have a clear understanding of the ingredients and their benefits, let’s dive into the preparation and cooking methods to create this delicious Zesty Lemon Herb Grilled Chicken.
Step 1: Marinate the Chicken
1. Prepare the Marinade: In a mixing bowl, combine 1/4 cup of fresh lemon juice, 2 tablespoons of olive oil, 3 minced garlic cloves, and a handful of chopped fresh herbs (such as parsley, thyme, and rosemary). Season with salt and pepper to taste.
2. Marinate the Chicken: Place 4 boneless, skinless chicken breasts into a resealable plastic bag or a shallow dish. Pour the marinade over the chicken, ensuring each piece is well coated. Seal the bag (or cover the dish) and refrigerate for at least 30 minutes, but preferably for 1-2 hours to allow the flavors to fully infuse.
Step 2: Prepare the Grill
3. Preheat the Grill: While the chicken is marinating, preheat your grill to medium-high heat. If using a charcoal grill, ensure the coals are ashed over for even cooking.
4. Clean and Oil the Grill Grates: To prevent sticking, clean the grates with a grill brush and oil them lightly with a paper towel dipped in oil. This step is crucial for achieving those beautiful grill marks and ensuring your chicken cooks evenly.
Step 3: Grill the Chicken
5. Remove Chicken from Marinade: After marinating, take the chicken out of the marinade and allow any excess to drip off. Discard the leftover marinade.
6. Grill the Chicken: Place the chicken breasts on the preheated grill. Cook for about 6-7 minutes on one side without moving them, allowing for nice grill marks to form. Flip the chicken and grill for an additional 6-7 minutes on the other side, or until the internal temperature reaches 165°F (75°C).
7. Rest the Chicken: Once cooked, remove the chicken from the grill and let it rest for about 5 minutes before slicing. This resting period allows the juices to redistribute, ensuring tender and flavorful meat.
Tips for Perfect Grilling
– Don’t Overcrowd the Grill: Ensure there is enough space between each piece of chicken. Overcrowding can lead to uneven cooking.
– Use a Meat Thermometer: To ensure your chicken is cooked perfectly, use a meat thermometer. This tool helps you avoid undercooking or overcooking your chicken.
– Experiment with Flavors: Feel free to customize the marinade with your favorite herbs or spices. Adding a pinch of red pepper flakes can give your chicken a nice kick!
Serving Suggestions
The Zesty Lemon Herb Grilled Chicken is incredibly versatile and can be paired with various sides for a complete meal. Consider serving it alongside:
– Grilled Vegetables: A medley of zucchini, bell peppers, and asparagus drizzled with olive oil and grilled to perfection.
– Cauliflower Rice: A low-carb alternative to traditional rice, cauliflower rice is a great way to add volume and nutrition to your plate.
– Salad: A fresh garden salad with mixed greens, cherry tomatoes, and a light vinaigrette complements the chicken beautifully.
– Avocado: Sliced avocado adds creaminess and healthy fats, making for a satisfying addition to your meal.
In the next section, we will explore another delightful recipe: Spicy Shrimp and Avocado Salad. Stay tuned as we continue our journey through these quick and easy low-carb high-protein meals that will not only satisfy your hunger but also nourish your body.
Preparation Steps for Zesty Lemon Herb Grilled Chicken
To prepare the Zesty Lemon Herb Grilled Chicken, start by marinating the chicken breasts to infuse them with flavor. Here’s how:
1. Marinate the Chicken: In a bowl, combine the juice of two lemons, minced garlic, chopped fresh herbs (like rosemary, thyme, or parsley), olive oil, salt, and pepper. Whisk these ingredients together until well blended.
2. Prepare the Chicken: Place the chicken breasts in a resealable plastic bag or shallow dish. Pour the marinade over the chicken, ensuring each piece is thoroughly coated. Seal the bag or cover the dish and refrigerate for at least 30 minutes, or up to 4 hours for deeper flavor.
3. Preheat the Grill: About 15 minutes before grilling, preheat your grill to medium-high heat.
4. Grill the Chicken: Remove the chicken from the marinade and let any excess drip off. Place the chicken on the grill and cook for about 6-7 minutes on each side, or until the internal temperature reaches 165°F (75°C) and the chicken is no longer pink in the center.
5. Rest and Serve: Allow the chicken to rest for 5 minutes before slicing. This helps retain juices for a moist and flavorful bite.
Serving Suggestions for Zesty Lemon Herb Grilled Chicken
To complement your Zesty Lemon Herb Grilled Chicken, consider these garnishes and side dish ideas:
– Fresh Herbs: Sprinkle freshly chopped parsley or dill over the chicken for a vibrant finish.
– Grilled Vegetables: Serve with a side of grilled zucchini, bell peppers, or asparagus brushed with olive oil and seasoned with salt and pepper.
– Salad: A simple arugula salad with lemon vinaigrette can lighten the meal and add a refreshing crunch.
– Cauliflower Rice: For a low-carb option, serve the chicken over a bed of cauliflower rice, which can be sautéed with garlic and herbs for added flavor.
—
Beef and Broccoli Stir-Fry
Understanding the Ingredients
Beef and broccoli is a classic dish that not only tastes great but is also packed with nutritional benefits. Beef is a rich source of protein, iron, and B vitamins, essential for energy production and overall health. Broccoli, on the other hand, is loaded with vitamins C and K, fiber, and antioxidants, making it a great addition to any meal. This combination provides a well-rounded, low-carb meal that supports muscle maintenance and overall wellness.
Cooking Instructions
Creating a flavorful Beef and Broccoli Stir-Fry is straightforward. Follow these steps to achieve the perfect dish:
1. Prepare the Beef: Slice 1 pound of flank steak against the grain into thin strips. This helps to tenderize the meat.
2. Marinate: In a small bowl, mix together soy sauce, minced garlic, and ginger. Add the beef strips to the marinade and let them soak for at least 15 minutes.
3. Cook the Broccoli: While the beef is marinating, steam or blanch 2 cups of broccoli florets until vibrant green and just tender, about 3-4 minutes. Drain and set aside.
4. Stir-Fry: Heat 2 tablespoons of oil in a large skillet or wok over high heat. Once hot, add the marinated beef in a single layer. Cook for about 2 minutes undisturbed, allowing it to sear before stirring.
5. Combine Ingredients: After the beef is browned, add the broccoli to the skillet. Pour in any remaining marinade and stir-fry everything together for another 2-3 minutes until the beef is cooked through and the broccoli is tender yet crisp.
6. Serve: Remove from heat and serve immediately, garnished with sesame seeds or green onions if desired.
Serving Ideas for Beef and Broccoli Stir-Fry
Pair your Beef and Broccoli Stir-Fry with the following options for a complete meal:
– Cauliflower Rice: This is an excellent low-carb alternative to traditional rice. Simply pulse cauliflower florets in a food processor until they resemble rice, then sauté with a bit of olive oil, salt, and pepper.
– Zucchini Noodles: For a fresh twist, serve your stir-fry over spiralized zucchini, which adds texture and keeps the dish light.
—
Almond-Crusted Salmon
Nutritional Value of Salmon
Salmon is not only a delicious fish but is also one of the healthiest proteins available. Rich in omega-3 fatty acids, salmon helps promote heart health, reduces inflammation, and supports brain function. Additionally, it’s an excellent source of high-quality protein, B vitamins, and selenium, making it a perfect fit for a low-carb, high-protein diet.
Preparation Steps for Almond-Crusted Salmon
Creating Almond-Crusted Salmon is simple and rewarding. Here are the steps to get started:
1. Preheat the Oven: Preheat your oven to 400°F (200°C).
2. Prepare the Salmon Fillets: Place 4 salmon fillets skin-side down on a baking sheet lined with parchment paper.
3. Make the Almond Crust: In a small bowl, mix together 1 cup of finely chopped almonds, 1 tablespoon of Dijon mustard, and a drizzle of olive oil. Stir until combined.
4. Coat the Salmon: Spread the almond mixture evenly over the top of each salmon fillet, pressing gently to ensure it adheres.
5. Bake: Bake in the preheated oven for about 12-15 minutes, or until the salmon flakes easily with a fork and the almond crust is golden brown.
Serving Recommendations for Almond-Crusted Salmon
To elevate your Almond-Crusted Salmon, consider these side dishes:
– Roasted Asparagus: Toss asparagus spears with olive oil, salt, and pepper, and roast them in the oven alongside the salmon for a quick and nutritious side.
– Quinoa Salad: A refreshing quinoa salad with cherry tomatoes, cucumber, and a light vinaigrette makes a great pairing.
– Steamed Broccoli: Simple steamed broccoli or sautéed greens will complement the richness of the salmon beautifully.
—
Avocado and Turkey Lettuce Wraps
Ingredient Overview
Avocado and turkey lettuce wraps are not only delicious but also packed with beneficial nutrients. Ground turkey is a lean source of protein, while avocados provide healthy fats, fiber, and a wealth of vitamins. This combination makes for a satisfying and nutritious meal that keeps carbs low and protein high.
Preparation Process for Avocado and Turkey Lettuce Wraps
To prepare these wraps, follow these steps:
1. Cook the Turkey: In a skillet over medium heat, add 1 pound of ground turkey. Cook until browned, breaking it apart with a spoon as it cooks. Drain any excess fat.
2. Season: Add salt, pepper, and your choice of seasonings, such as garlic powder or taco seasoning, to the turkey. Stir well and cook for an additional 2-3 minutes until fully cooked.
3. Prepare the Lettuce: Select large lettuce leaves from a head of iceberg or romaine. Rinse and dry them thoroughly.
4. Assemble the Wraps: Spread a layer of mashed avocado on each lettuce leaf, then top with the cooked turkey mixture. Add extra toppings if desired, such as diced tomatoes, shredded cheese, or hot sauce.
5. Wrap and Serve: Carefully fold the sides of the lettuce over the filling and enjoy!
Customizing Your Wraps
Feel free to customize your turkey lettuce wraps to suit your taste preferences:
– Spicy Kick: Add diced jalapeños or a drizzle of sriracha for heat.
– Mediterranean Flair: Incorporate feta cheese and olives for a Mediterranean twist.
– Asian Inspiration: Mix in soy sauce and sesame oil for an Asian-inspired flavor profile.
—
Chia Seed Pudding with Nuts
Health Benefits of Chia Seeds
Chia seeds are tiny yet mighty superfoods. They are high in omega-3 fatty acids, fiber, and protein, making them an excellent choice for a nutritious snack or breakfast. Additionally, they help improve digestion, stabilize blood sugar levels, and promote heart health.
Preparation Instructions for Chia Seed Pudding
Making chia seed pudding is easy and requires minimal ingredients. Follow these steps:
1. Combine Ingredients: In a bowl or jar, mix together 1/4 cup of chia seeds, 1 cup of almond milk (or any milk of your choice), and a sweetener like honey or maple syrup. Stir well to prevent clumping.
2. Refrigerate: Cover the mixture and refrigerate for at least 2 hours or overnight. This allows the chia seeds to absorb the liquid and create a pudding-like consistency.
3. Stir Before Serving: Once ready, give the pudding a good stir. If it’s too thick, add a splash of milk to reach your desired consistency.
Serving Suggestions for Chia Seed Pudding
Enhance your chia seed pudding with these delicious toppings:
– Fresh Fruits: Top with berries, sliced bananas, or mango for added sweetness and flavor.
– Nuts and Seeds: Sprinkle with almonds, walnuts, or pumpkin seeds for extra crunch and nutrition.
– Coconut Flakes: Add unsweetened coconut flakes for a tropical twist.
—
Spinach and Feta Stuffed Chicken Breast
Ingredient Insights
Spinach and feta cheese are a powerful duo. Spinach is rich in iron, vitamins A, C, and K, while feta cheese brings flavor and calcium to the table. This combination makes for a healthy and satisfying filling in chicken breasts, providing protein and essential nutrients.
Preparation Method for Spinach and Feta Stuffed Chicken Breast
To prepare this dish, follow these steps:
1. Preheat the Oven: Preheat your oven to 375°F (190°C).
2. Prepare the Filling: In a skillet, heat 1 tablespoon of olive oil over medium heat. Add 2 cups of fresh spinach and sauté until wilted. Remove from heat and let it cool slightly. Mix in 1/2 cup of crumbled feta cheese and a pinch of salt and pepper.
3. Prepare the Chicken: Take 4 boneless, skinless chicken breasts and make a pocket in each by slicing them horizontally, being careful not to cut all the way through.
4. Stuff the Chicken: Spoon the spinach and feta mixture into each chicken pocket, securing with toothpicks if necessary.
5. Bake the Chicken: Place the stuffed chicken breasts in a baking dish, drizzle with olive oil, and season with salt and pepper. Bake for 25-30 minutes, or until the chicken is cooked through and juices run clear.
Pairing Ideas for Spinach and Feta Stuffed Chicken Breast
Serve your stuffed chicken with a variety of sides:
– Roasted Vegetables: Roasted carrots, bell peppers, or Brussels sprouts make a colorful and nutritious addition.
– Greek Salad: A fresh Greek salad with cucumbers, tomatoes, olives, and a light vinaigrette complements the flavors of the stuffed chicken.
—
Coconut Flour Pancakes
Nutritional Profile of Coconut Flour
Coconut flour is a fantastic alternative to traditional flour, especially for those following a low-carb diet. It is high in fiber, gluten-free, and contains healthy fats. Additionally, coconut flour is lower in carbohydrates compared to regular flour, making it a great choice for satisfying pancakes without the carb overload.
Preparation Instructions for Coconut Flour Pancakes
Making coconut flour pancakes is quick and easy. Here’s how:
1. Mix the Dry Ingredients: In a bowl, combine 1/2 cup of coconut flour, 1 teaspoon of baking powder, and a pinch of salt.
2. Combine Wet Ingredients: In another bowl, whisk together 4 eggs, 1/4 cup of almond milk, and 2 tablespoons of melted coconut oil or butter.
3. Combine Mixtures: Gradually add the wet ingredients to the dry ingredients, stirring until the mixture is smooth. Let it sit for a few minutes to thicken.
4. Cook the Pancakes: Heat a non-stick skillet over medium heat and lightly grease it. Pour 1/4 cup of batter onto the skillet for each pancake. Cook for 2-3 minutes on each side, until golden brown.
Serving Suggestions for Coconut Flour Pancakes
Enhance your pancakes with various toppings:
– Fresh Berries: Top with strawberries, blueberries, or raspberries for a burst of flavor and color.
– Maple Syrup: Drizzle with sugar-free maple syrup or honey for sweetness.
– Nut Butter: Spread almond or peanut butter on top for added protein and richness.
—
Conclusion: Embracing Quick and Easy Low Carb High Protein Meals
The recipes presented above provide a diverse range of flavors and nutrients, ensuring that anyone can enjoy delicious meals while adhering to a low-carb, high-protein diet. With simple preparation methods and readily available ingredients, these meals are perfect for busy individuals who want to maintain healthy eating habits. Enjoy experimenting with these recipes and discovering new favorites that align with your dietary goals. Whether you opt for zesty grilled chicken, savory stir-fries, or delightful pancakes, you’ll find that eating healthily doesn’t have to be complicated or time-consuming.