
Introduction
Katsu bowls have taken the global culinary scene by storm, captivating food lovers with their delightful combination of crispy fried meat, fluffy rice, and vibrant toppings. Rooted in Japanese cuisine, these bowls are a feast for both the eyes and the palate. At the heart of a katsu bowl lies tonkatsu—breaded and deep-fried pork cutlets that achieve a perfect golden brown, delivering a satisfying crunch with every bite. What elevates this dish further is the homemade tonkatsu sauce, which adds a flavorful punch and allows for personalization based on individual taste preferences.
In this detailed recipe, we will guide you through the process of creating delicious crispy katsu bowls right in your own kitchen. From the preparation of the tonkatsu to the creation of the rich, umami-packed tonkatsu sauce, we promise a step-by-step approach that will make this mouthwatering dish accessible to everyone, whether you’re a seasoned chef or a kitchen novice.
Understanding Tonkatsu and Its Cultural Significance
Tonkatsu, a dish that has become synonymous with comfort food in Japan, has a fascinating history. Its origins can be traced back to the late 19th century, during the Meiji era, when Western influences began to permeate Japanese cuisine. The idea of breading and frying meat was a novel concept at the time, and tonkatsu was born out of the desire to adapt Western cooking methods to local tastes. Initially made with beef, the dish eventually settled on pork, specifically pork loin or pork tenderloin, which offered a tender texture that complemented the crispy exterior.
As tonkatsu gained popularity, it evolved into a staple in Japanese households, restaurants, and bento boxes. The dish’s appeal lies not only in its satisfying crunch but also in the way it balances flavors and textures. The savory, juicy pork contrasts beautifully with the crispy panko coating, while the accompanying tonkatsu sauce introduces a complex layer of sweetness and tanginess. This combination has made tonkatsu a beloved dish not just in Japan, but around the world, with many restaurants and home cooks putting their own spin on the classic recipe.
A crucial component of tonkatsu is the sauce that accompanies it. Traditionally, tonkatsu sauce is a thick, dark condiment that combines ingredients like soy sauce, Worcestershire sauce, and various spices to create a rich umami flavor. This sauce not only enhances the taste of the fried pork but also adds depth to the entire katsu bowl experience. It’s this sauce that allows for customization—some prefer it sweeter, while others lean towards a spicier profile. In this recipe, we will show you how to make a homemade tonkatsu sauce that perfectly complements your crispy katsu.
Ingredients Overview
To make our crispy katsu bowls with homemade tonkatsu sauce, you will need a selection of fresh ingredients. Below is a comprehensive breakdown of what you’ll need for both the tonkatsu and the sauce.
Tonkatsu Sauce Ingredients
1. Ketchup – Adds sweetness and a rich tomato flavor to the sauce.
2. Worcestershire Sauce – Provides a tangy and slightly spicy depth.
3. Soy Sauce – Introduces umami and saltiness to balance the sweetness.
4. Mirin – A sweet rice wine that adds a subtle sweetness and depth of flavor.
5. Dijon Mustard – Contributes a slight heat and complexity.
6. Sugar – Enhances the sweetness and helps balance the acidity of the sauce.
7. Garlic Powder – Imbues the sauce with aromatic flavor notes.
8. Ground Ginger – Adds warmth and a hint of spice.
Tonkatsu Ingredients
1. Pork Loin Chops – The star of the dish, chosen for its tenderness and flavor.
2. Salt and Pepper – Essential for seasoning the pork before cooking.
3. Flour – Used for dredging the pork, helping the egg wash adhere.
4. Eggs – Acts as a binding agent for the breadcrumbs.
5. Panko Breadcrumbs – Japanese-style breadcrumbs that create an extra crispy coating when fried.
6. Vegetable Oil – For frying, ensuring the tonkatsu is crispy and golden brown.
Preparation Steps for Tonkatsu Sauce
Creating the perfect tonkatsu sauce is straightforward and can be done in a matter of minutes. This sauce can also be made in advance, allowing the flavors to meld together for an even richer taste.
Mixing the Ingredients
1. In a medium mixing bowl, combine 1/4 cup of ketchup with 2 tablespoons of Worcestershire sauce. This foundation provides the sweetness and tang that defines tonkatsu sauce.
2. Add 2 tablespoons of soy sauce, which will deepen the umami flavor profile and saltiness of the sauce.
3. Pour in 1 tablespoon of mirin to introduce a hint of sweetness and a touch of sophistication.
4. Mix in 1 teaspoon of Dijon mustard to add a layer of complexity and a mild heat.
5. Stir in 1 tablespoon of sugar to further enhance the sweetness and balance the acidity of the other ingredients.
6. Finally, sprinkle in 1/2 teaspoon of garlic powder and 1/4 teaspoon of ground ginger for aromatic and flavorful depth.
Once all the ingredients are combined, whisk them together until the mixture is smooth and well-integrated. Allow the sauce to sit for at least 15 minutes, or even longer if you have the time. This resting period allows the flavors to meld, resulting in a more harmonious sauce that will perfectly complement your crispy katsu.
Preparation Steps for Tonkatsu
Now that we’ve prepared our tonkatsu sauce, it’s time to focus on the star of the dish: the crispy tonkatsu. This process involves seasoning, breading, and frying the pork loin chops to achieve that desired texture and flavor.
Seasoning the Pork Chops
Begin by taking your pork loin chops, ideally about 1-inch thick. Pat them dry with paper towels to remove moisture—this helps achieve a crispy crust during frying. Season both sides generously with salt and black pepper. The seasoning is crucial as it enhances the natural flavor of the pork and prepares it for the frying process.
Dredging Station Setup
Setting up a dredging station is key to ensuring your tonkatsu turns out perfectly crispy. You will need three shallow dishes for the breading process:
1. Flour Dish: Place about 1 cup of all-purpose flour in the first dish. This will create a dry base and help the egg adhere to the pork.
2. Egg Wash Dish: In the second dish, crack 2 large eggs and whisk them until well combined. This egg wash will bind the panko breadcrumbs to the pork.
3. Panko Breadcrumbs Dish: Fill the third dish with about 1 1/2 cups of panko breadcrumbs. These Japanese-style breadcrumbs are larger and airier than traditional breadcrumbs, giving your tonkatsu that signature crunch.
With your dredging station set up, you’re ready to coat the pork loin chops. Dredge each chop first in the flour, ensuring an even coating on both sides. Shake off any excess flour before dipping the chop into the egg wash, allowing it to soak up the moisture. Finally, coat the chop with panko breadcrumbs, pressing gently to ensure the breadcrumbs adhere well. Repeat this process for all the pork loin chops, and set them aside on a plate.
These initial steps are crucial for preparing a mouthwatering tonkatsu that will shine in your crispy katsu bowls. Stay tuned for the next part, where we will cover the frying process, assembly of the katsu bowls, and tips to make your dish truly outstanding.
Setting Up the Dredging Station
To achieve that signature crispy coating on your pork chops for the Katsu bowls, a well-organized dredging station is essential. This setup ensures that each piece of meat is uniformly coated, which enhances both texture and flavor. The dredging station typically consists of three shallow bowls or plates:
1. Flour: Start with all-purpose flour in the first bowl. The flour creates a base layer that helps the egg adhere to the pork, ensuring that the breadcrumbs stick effectively.
2. Egg Wash: In the second bowl, whisk together eggs, which act as a binding agent. The egg wash is crucial as it helps the breadcrumbs cling to the pork, leading to a thicker and crunchier crust.
3. Panko Breadcrumbs: In the third bowl, place the panko breadcrumbs. Panko, a Japanese-style breadcrumb, is lighter and crispier than traditional breadcrumbs, providing that delightful crunch you want in a Katsu.
Coating Process
– Begin by taking a pork chop, dredging it in flour, and shaking off any excess. This initial layer is essential for moisture retention during frying.
– Next, dip the floured pork into the egg wash, fully coating it. Dripping off excess egg is important to prevent a soggy crust.
– Finally, press the pork into the panko breadcrumbs, ensuring an even coating. Don’t be shy—press down firmly so that the breadcrumbs adhere well.
This meticulous coating process ensures that each bite of your Katsu is deliciously crispy and flavorful, making it a standout component of your bowl.
Frying the Tonkatsu
With your pork chops properly coated, it’s time to fry them to perfection. Frying is where the magic happens; the right technique will yield a beautifully golden and crispy Katsu.
Oil Temperature
– Heat a generous amount of vegetable oil in a large skillet over medium heat. The oil should be about half an inch deep. The perfect frying temperature is between 350°F to 375°F (175°C to 190°C). If you don’t have a thermometer, you can test the oil by dropping a few breadcrumbs into it; if they sizzle and rise to the surface, the oil is ready.
Frying Process
– Carefully place the coated pork chops into the hot oil, ensuring not to overcrowd the pan. Overcrowding lowers the oil temperature, leading to soggy Katsu instead of crispy perfection. Fry in batches if necessary.
– Cook each pork chop for about 3-4 minutes per side, turning them only once to prevent breaking the crust. The goal is to achieve a deep golden brown color, indicating that the breadcrumbs are crisp and the pork is cooked through.
– Once done, remove the Katsu from the skillet and place it on a paper towel-lined plate to absorb any excess oil.
The frying process is key to ensuring your Tonkatsu is juicy on the inside and perfectly crisp on the outside.
Assembling the Katsu Bowls
Now that you have your succulent fried Tonkatsu, it’s time to assemble your Katsu bowls. This step is not only about combining ingredients but also about creating an appealing presentation that tempts the taste buds.
Layering the Ingredients
1. Start with Rice: Begin by placing a generous scoop of steamed white rice at the bottom of each bowl. The rice serves as the hearty base for your Katsu bowl, absorbing the flavors from the sauce and other ingredients.
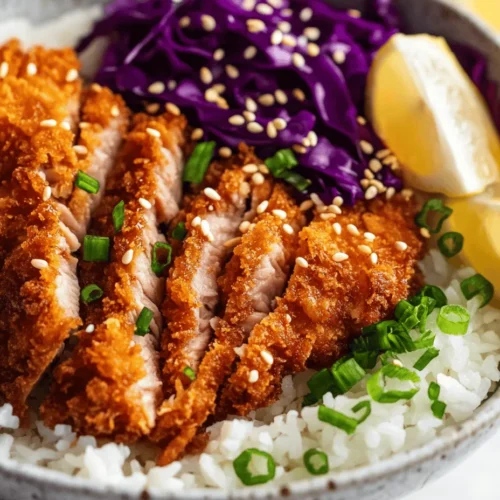
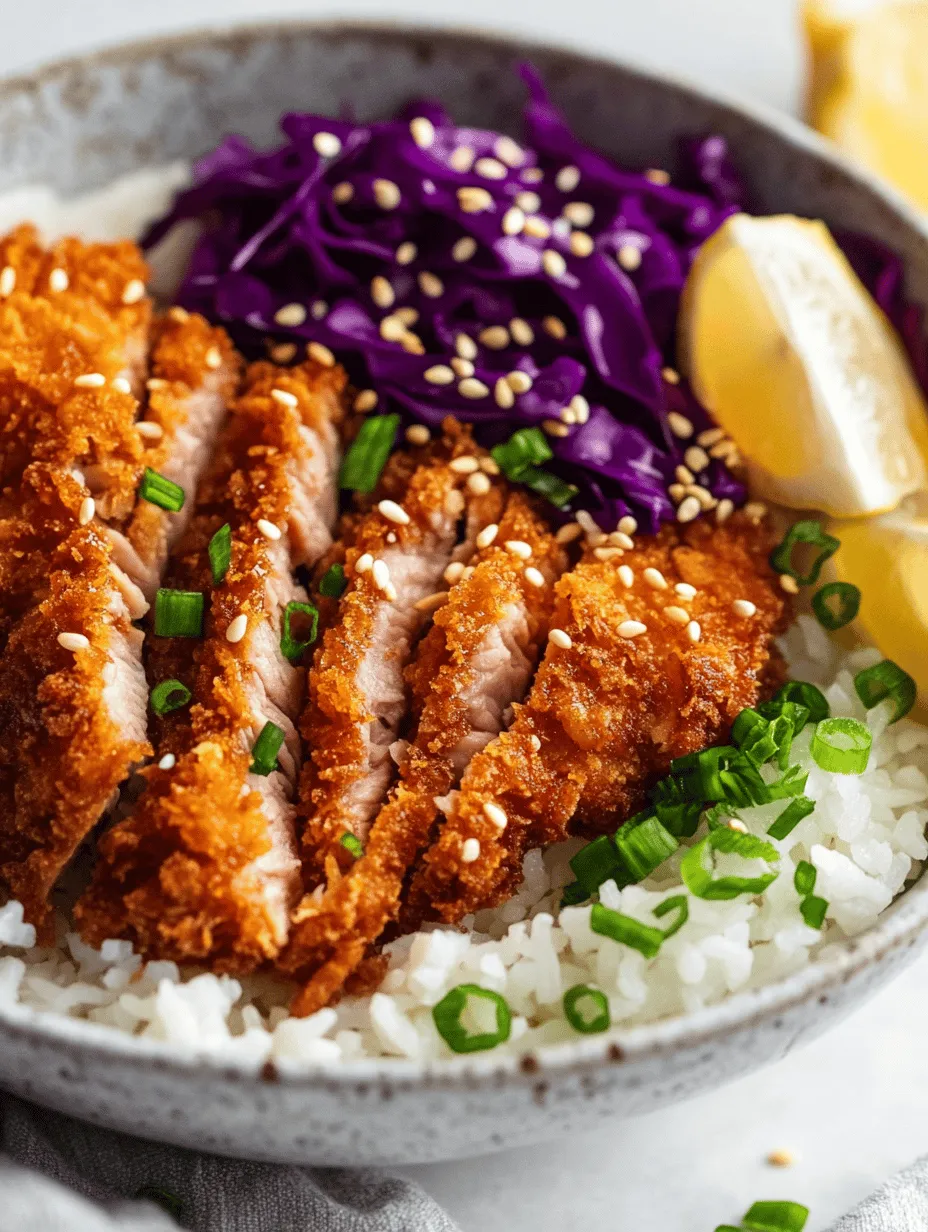
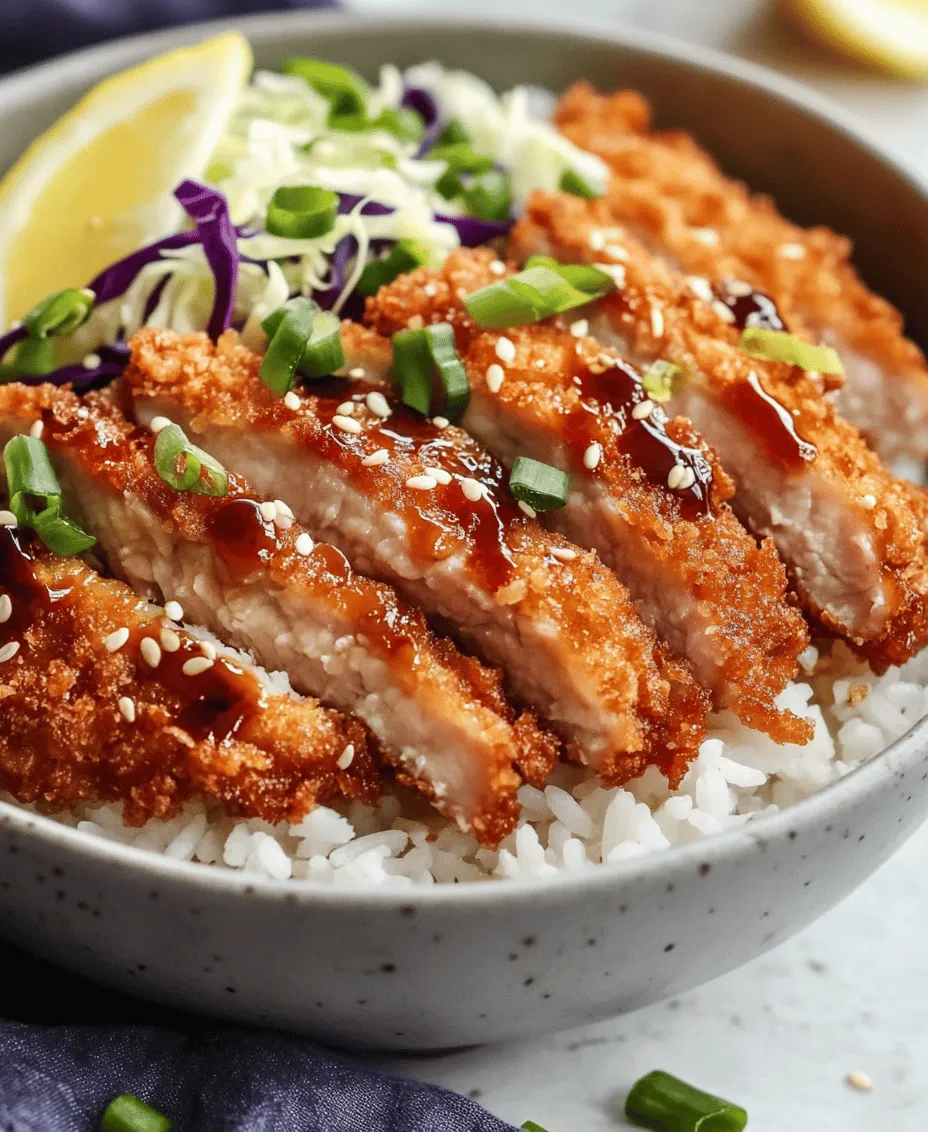
2. Add the Tonkatsu: Slice the fried Tonkatsu into strips about half an inch thick. Arrange the slices neatly over the rice, allowing the golden crust to shine. The presentation is vital; aim for a visually appealing layout as it enhances the overall dining experience.
3. Incorporate Cabbage: Top the Katsu with a handful of finely shredded cabbage. This not only adds a delightful crunch but also a fresh element that balances the richness of the pork.
4. Garnish: Finally, sprinkle chopped green onions and sesame seeds over the top for added flavor and a pop of color. This finishing touch elevates the dish and makes it look restaurant-worthy.
Serving Suggestions and Variations
Katsu bowls are versatile and can be customized in many ways to suit personal tastes.
Accompaniments
– Consider serving your Katsu bowls with lemon wedges on the side. A squeeze of fresh lemon juice adds brightness and cuts through the richness of the fried pork.
– Pickled vegetables, such as pickled ginger or daikon, can also complement the dish, providing a tangy contrast that enhances the overall flavor profile.
Variations on the Katsu Bowl
– While pork is the traditional choice, you can easily swap it out for chicken or even tofu for a vegetarian option. Chicken Katsu is just as delicious and can be prepared using the same method.
– For a modern twist, add toppings like avocado slices or a drizzle of spicy mayo to give your Katsu bowl an exciting kick. These additions not only enhance the flavor but also offer a creamy texture that pairs well with the crispy elements.
Nutritional Information
Understanding the nutritional benefits of the ingredients used in your Katsu bowls can help you make informed choices.
– Pork: A lean cut of pork provides high-quality protein and essential vitamins like B12, which is crucial for energy production.
– Cabbage: Rich in vitamin C, fiber, and antioxidants, cabbage adds not just crunch but also a healthful boost to your meal.
– Rice: As a carbohydrate source, rice fuels your body with energy, making it a staple in many cuisines.
Healthier Alternatives
If you’re looking to make your Katsu bowls a bit lighter, consider the following alternatives:
– Lean Cuts of Meat: Opt for leaner cuts of pork, such as tenderloin, to reduce fat content while still enjoying the delicious flavors of the dish.
– Baking Instead of Frying: For a healthier cooking method, you can bake the coated pork instead of frying. Preheat your oven to 400°F (200°C), place the breaded pork on a baking sheet lined with parchment paper, and spray lightly with cooking spray. Bake for about 20-25 minutes, flipping halfway through, until golden brown and cooked through.
Conclusion
Making crispy Katsu bowls with homemade tonkatsu sauce is a rewarding culinary experience that brings together delightful textures and flavors. From the meticulous dredging process to the frying technique that yields a perfect crust, every step is essential in creating this mouthwatering dish. The presentation, with layers of rice, Tonkatsu, and fresh cabbage topped with garnishes, makes your Katsu bowl not just a meal but a feast for the eyes.
As you explore this recipe, remember that cooking is an opportunity for creativity. Feel free to experiment with different proteins and toppings to make it your own. Enjoy the process of preparing this comforting dish, and share it with family and friends for a wonderful dining experience. With each bite, you’ll savor the crispy, juicy, and flavorful goodness that is the hallmark of a homemade Katsu bowl.